Last year I showed some photos relating to pruning fruit trees. http://mountaingardengleanings.blogspot.ca/2011/04/pruning-fruit-trees.html This year, I decided to give a few more tips and techniques. We are not pruning experts by any means, but Barry watched and learned from a master. He is able to see what happens when you do or don't follow what was taught.
We do our pruning during the winter. Some people prune in spring but we find there are enough other jobs to do then, so it is easier to get out there on nice days during the winter season and "get 'er done". In some locations, (like Saskatchewan, for example) winter pruning would be cold and uncomfortable and you may want to wait until better weather.
This photo shows thinning. You can see the centre branch was cut off. If it had been left, the three branches would rub and side branches would cross. You don't want this as the fruit needs open areas to grow. We had some fruit trying to grow between branches and it gets misshapen and also is an easier target for pests to attack.

On this branch you can see all the new growth. Mario called these "knuckles" and especially on apple trees, this is where the fruit grows from. If you cut off all the growth with knuckles, you won't have apples.

Here Barry is doing directional pruning. When you cut off a branch, you want to cut it above a bud that is on side that you want the branch to grow towards.

This shows the branch with the bud on the left under the cut. This is where the new branch will grow. You usually want your branches to grow out instead of crowding the centre of the tree.

Here he is removing the end of this branch. If you leave some of the branches too long, the fruit will weigh them down and they will hang too low or even break. You want to be able to pick fruit comfortably but you don't want the branches in the way for mowing and walking. You have to decide what is best for the space you have and the shape and size of your trees.

This tree has many crooked and crossed branches so each year more are pruned out. Pruning is a progression. You cut some branches off, then wait for new ones to grow so you can prune and shape them the way you want them to grow.

When cutting off larger branches, you want to cut them close to the trunk of the tree. If you don't, you get numerous shoots growing from the area in big lumpy messes.

Here is a tree before pruning. You can see all the long straight branches growing straight up. These are all new growth from last year that need to be controlled to keep the fruit growing low enough to pick without a tall ladder.

Here you can see a tree that needs pruning in the centre. If the leaves are too thick in the centre, the fruit is shaded too much and has trouble ripening. There is a happy medium to having an airy centre to your tree and not going too far and cutting out all the centre of the tree. Some of our trees had the centres cut completely out and it is very difficult to coax the growth back.

Sometimes when you have too many gnarls and crossed branches, it is best to cut off the whole branch. This is the before pic.

During the process, using a pruning saw.

After the branch is gone. You can see the space in the centre but can also see the side branches from the other branches will fill that area and not be so crowded.
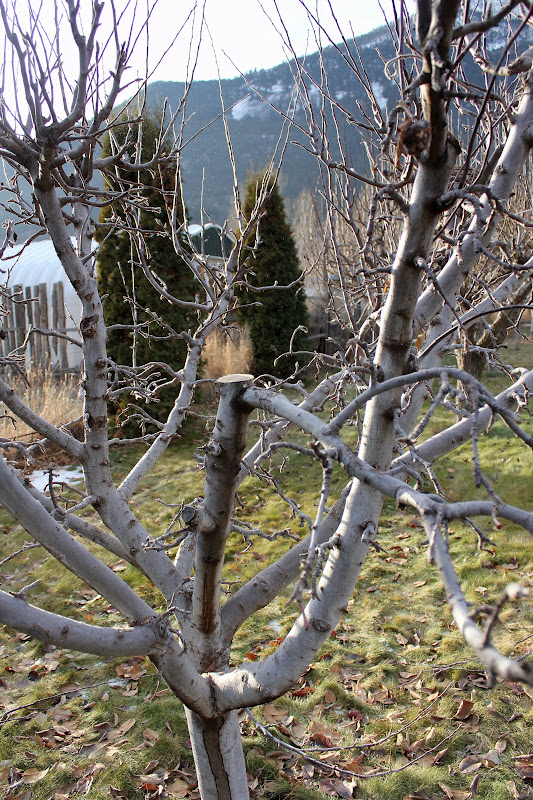
Here is another example of the tree before major pruning.

Here is the same tree after. Again everything has more room to grow.

Here are the pruning tools we use most of the time. We have another saw/cutter that is used for taller trees. We used it when we lived in Calgary but don't use it much here.

Trees are very forgiving and will keep growing despite a bad pruning. They may not look their best or produce the best crop but will continue to grow. We are trying to prune for production and to keep the trees low enough to be able to harvest without climbing a ladder. This is possible for most of the trees but some were too tall when we bought the place to be able to prune them enough to harvest fruit from the ground. We keep learning more about pruning each year.