Thursday, September 29, 2011

Uses for Wood Shavings

We get wood shavings from a sawmill near town.  There are several mills around here and they all give away their wood shavings.  It saves them having to pay to haul them away.  We have found one place that has the perfect shavings for us.  At some of the other places, they are too fine and contain too much sawdust so they are hard to use.  All you need is a shovel and garbage bags and you are in business.

We mostly use the shavings for the chicken coop.  I use the deep-litter method to cover the floor and find it works great with little or no smell and little work on a daily and weekly basis. 

How the deep-litter method works is that you cover the floor with shavings and as the girls poo (usually from high on the roosts at night) you add more shavings and it all gets mixed together.  The shavings keep the floors dry and relatively odor free.  Some people rake out the droppings but I don't.  Some people stir them into the shavings but I don't.  What I do is occasionally throw in a handful of scratch (grain) and the girls stir it up with their digging and scratching.  When the shavings are too dirty, usually they are 6 to 8" deep they get hauled out to use in the garden and we start again.  They get spread on the half of the garden we are not using that year and dug in so they break down and provide nutrients for the next season.

I also read that you can use the shavings as ground cover so I decided to try that in the raspberry patch.  First we weeded between the rows.


Then it was rototilled and raked smooth.


Next we overlapped newspapers.  We layered them around half a dozen pages thick or so.  This is supposed to help keep the weeds down.


After the newspaper was down, we dumped on the shavings and spread them around.


The shavings are around three inches thick between the rows.


Now doesn't that look nice?  I think it will work great so we won't have to till between the rows.  If the shavings get too packed, we can just add more.  All it takes is a trip to the mill and we're in business again.


If it works well then we will use paper and shavings as ground cover between all the permanent rows at the back.  Only time will tell.  ;)


Sunday, September 25, 2011

Big Horn Sheep

I was on the road between Lillooet and Lytton earlier this summer when I noticed the sheep on the rocks near the road.


They were very calm and the traffic did not bother them at all.


I was able to pull over and snap a bunch of pics and thought I would share them with you.


Aren't those a lovely set of horns!


Sheep on two levels.  They were amazing to watch climbing all over the rocks and ledges.


Here one decided to cross the road and went down the steep slope there possibly for a drink of water at the river.


Some of these pics look as if the sheep posed for me.


Off he goes to check something out.


Checking out the view.


Another great pose!


I was able to catch one short sequence of him climbing down.


Back again where he started.


Thursday, September 22, 2011

Greek Salad

I love Greek Salad.  Since my cukes and tomatoes have been ready in the garden, I've eaten this salad at least three or four times a week.  Even when only my cucumbers were ready, I ate a modified version with only cukes on a regular basis.

There are a number of different ingredients that you can use for Greek Salad but I'll show you my version.  You can use this as a starting spot and add, subtract or change whatever you like to make it your own.

I start with three or four cucumbers, depending on the size and how many people I am serving.


I used a bunch of cherry tomatoes that grew 1 1/4" to 1 1/2" in diameter.  I don't know the variety because I had quite a number of volunteers this year from the produce chipped from the grocery store.  I had tomatoes, squash, melon and pumpkin that grew on their own.  Some got pulled out but many were left to see what they produced.


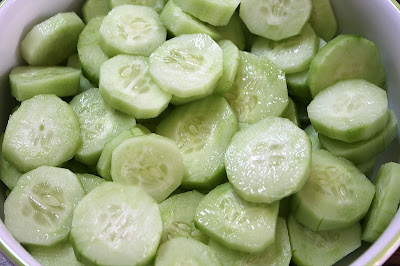
Peel and slice the cukes.  Some people like wedges or very thick slices.  I like mine about 1/2" thick.  Some people also remove the seedy centres but I like them. 


Since the tomatoes were too large for one bite, I sliced them in half.  I do you large tomatoes cut into chunks on occasion but am saving them for canning this year.


I like to use pitted black olives and cut them in half.  Some people use whole olives with pits.


Crumble on some feta cheese.  Many people also add onion slices - either white or red but raw onions don't agree with me so I leave them out.  My sister-in-law also adds green peppers chunks.


Sprinkle on crushed oregano leaves.  I like oregano alot so I crush two large pinches of it.


I then drizzle on olive oil and balsamic vinegar.  My mom uses regular vinegar but to me the taste is lacking the flavor of the balsamic.


There you are all ready to go.  Again I didn't give amounts because I find more or less oil and vinegar is all a matter of taste.


Toss the salad to mix and coat it all with the oregano, oil and vinegar.  Add salt and/or pepper to taste if you wish - I don't.  Enjoy!  ;)


Monday, September 19, 2011

Mount Robson

Mount Robson is the highest point in the Canadian Rockies.  Many of the mountains lose their snow-covering during the summer but Mount Robson never does.


Here is the Rocky Mountain Goat that guards the entrance to the park.


Lulu stopped to stretch her legs and take a look around.  While visiting the goat, Lulu also met a family from Prince George, BC who all wanted to pet her and take her picture.


Being the ambassador for chickens that she is, Lulu was a perfect lady and let all the children pet her.  The one girl couldn't get over how soft her feathers were, while her little brother wanted to know if I bought her at a store.


After they left, Lulu had some time to check out her surroundings.  She wasn't too impressed with the stop because there was not much to interest a chicken.


Here is another view of Mount Robson from the parking lot near the information centre.  We stopped here on the way home so Lulu could stretch her legs again.  She really enjoyed the grassy area amongst the trees at the far end of the parking lot where she found things to eat and peck at.  This was more of her style of pit stop. ;)


Thursday, September 15, 2011

Baby Robins


One day during mid August I was working in the garden and noticed a young robin hopping around on the ground in the chicken run.  He didn't seem able to fly so I moved him into the garden so the chickens wouldn't hurt him.


He ran around cheeping loudly and soon there was a full grown robin flying about checking him out. 


He was so cute but seemed to young for the time of year.  I didn't think he'd mature enough to make the long flight south for the winter.


I had to leave to pick up chicken food and didn't want the neighbour's cat to get the little fellow so I set him up in a tree.


He seemed content there and his parent came and checked on him and even brought him some worms.


Doesn't he have the cutest face?  He seemed to have a swelling near his mouth on the other side of his beak.  I thought maybe he hit face first when he fell in his flight attempt.


After I came home I set him down in the garden not knowing what else I could do.  He looked so small and forlorn.


Nearby in the corn patch I noticed another baby robin.  Look at those cute tufts on its head.  I could just hug that sweetie and wanted to keep him.


This one was even smaller and had less grown up feathers that its brother.  Mom or pop was staying nearby bringing food.


I hope they are survivors and are able to make the flight south.  I also hope they get strong enough to get off the ground and keep away from cats.  They disappeared into the corn patch so I hope they are fine.


Update:  Just last week I found one poor dead baby bird in the backyard.  I fear it is one of those little cuties but can never be sure.  All I can do is hope and pray they survived. :{

Monday, September 12, 2011

Three Plum Jam

We have a number of varieties of plums growing in our yard.  We have the purple Italian or prune plums that I make into prunes later in the fall.  We also have three earlier varieties that I decided to mix and make into a Three Plum Jam. 

The three plums I used are a round red variety similar to Santa Rosa plums,  a round yellow plum that is very juicy and has a very short season and larger oval plum that turns a dark purple over time. We don't know the names of the fruit we have here, we just guess at them.


I didn't use a recipe as such, I just checked out a number of recipes on the internet and found the proportions for ingredients were similar in most.

Ingredients 

12 c plums total (I used 4 cups of each kind)
½ c lemon juice
6 c sugar
2 c homemade pectin


Wash and sort plums of your choice. 


Pit plums and cut into pieces if plums are firm.  For the larger purplish red plums, I cut them into eighths.


As mentioned before, the yellow plums are very juicy.  You more or less try to remove the pit and cut the skin into pieces without making a big mess.  I often poke a hole with the knife and squeeze out the pits catching the juice and pulp in a bowl and then cut/rip the skin into pieces.  If you eat one of these plums, you almost need to put the whole plum into your mouth before you bite it or else you will be covered in juice from your chin to your waist.  They are not a plum to eat in public - you either look like a messy slob with juice dripping off your chin or a pig with a whole plum stuffed into your mouth.


The red plums were juicy as well so they were pitted and their skins chopped into smaller pieces just like the yellow ones.


Mix all ingredients in a large heavy pot and bring to a boil.  Stir frequently for about 30 minutes or so.  I actually had to cook them for almost an hour.  The length of cooking time depends on how juicy your plums are.  If I had used only the larger purplish/red plums, my cook time would have been shorter.


Skim off the foam and cook until it passed the jam test.  (the saucer in the freezer mentioned in previous posts).


Pour into sterilized jars and process for 10 minutes in a hot water bath. 


The recipe made 9 pints of lovely red jam.  Isn't it a pretty colour!  ;)