Monday, July 30, 2012

Dehydrated Kale Chips

I first tasted Kale Chips in Valemount at Barry's niece's place.  They were wonderful.  So I decided to plant kale this year so I could make some chips.  Right now we are having a heatwave (temps are +35°C) so it is too hot to use the oven.  I found a couple of recipes that use the dehydrator so decided to try that.

http://goodlookinghomecooking.blogspot.ca/2012/05/dehydrator-diaries-kale-chips-with.html
http://vegetarian.about.com/od/rawfoodsrecipes/r/Raw-Kale-Chips.htm

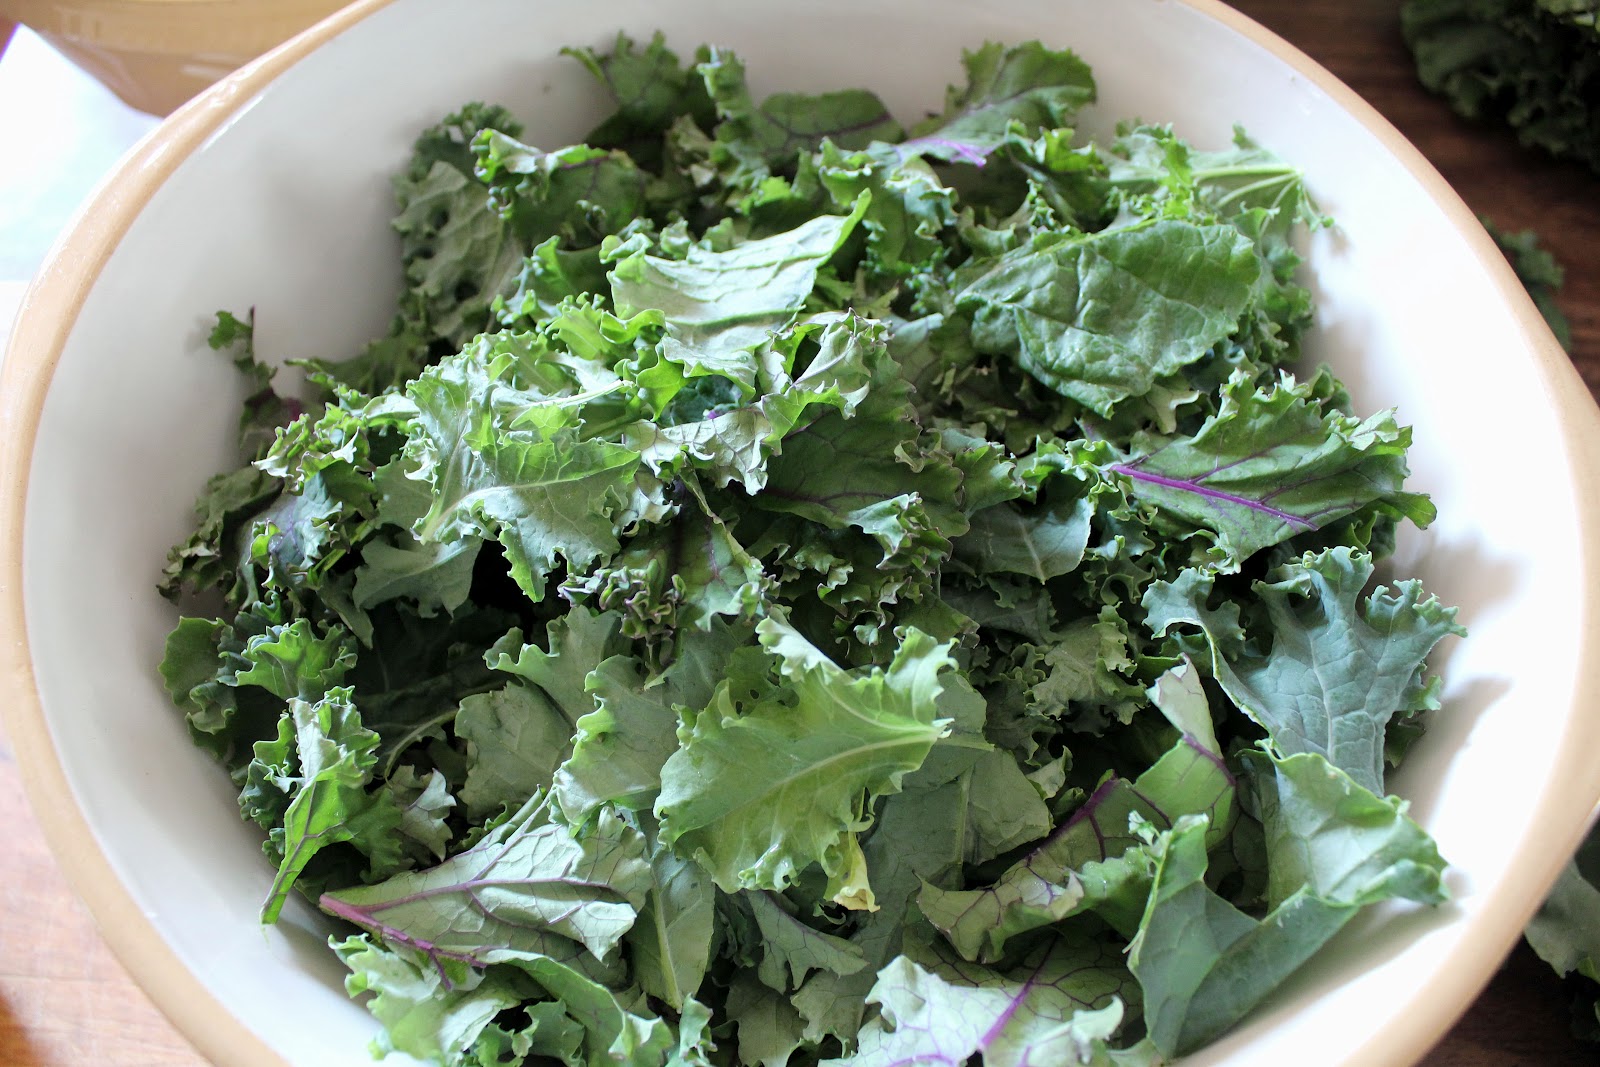
I planted two kinds of kale this year - Dwarf Green Curly and Redbor F1.  I won't plant the Redbor again as it was very expensive for the seeds ($3.99 for a package that contained 18 seeds!  And out of those only 8 grew!)  The green with do nicely, thank you very much!

Here is a leaf of green kale and one of the red kale.


Here is the kale all washed and spun dry.


Rip the kale into bite-sized pieces.  Do not use the tough middle stalk.


Drizzle on olive oil and sprinkle with salt.  Add whatever seasoning you want.  Some ideas that I tried are listed below.  Mix well using your hands making sure oil, salt and spices cover all the pieces.


Lay out on dehydrator trays in single layer.  Try to have some air space around the pieces of kale.


Dry for 2 hours on 135°F or until dry and crispy.


Eat and enjoy.  Or as I read on the internet, put in a ziplock bag and freeze.  I decided to freeze some so I have snacks for the winter.  I left the bags fat with air so the chips won't crush so easily.  I also placed them in the freezer basket so they won't have something heavy land on them. 

UPDATE - I tried the chips from the freezer and they were a bust.  They did not keep their crunch and were very chewy.  The flavor was good but I miss the crunch and got tired of chewing.  Oh well, you just don't know until you try something.


I have been trying a variety of flavors to see what I like best.

1.  garlic powder - favorite so far

2.  balsamic vinegar - so-so, I wanted a salt and vinegar flavor but balsamic vinegar was too mild - needed more bite to it

3.  lemon juice and black pepper - good, the lemon flavor came through as well as a slight bite from the pepper

4. parmesan cheese - second favorite - very tasty

5.  dried dill weed and a bit of cayenne pepper - can taste dill a bit but no bite (not enough cayenne and dill taste not strong enough)


6.  lemon juice and garlic powder -good - nice bite from the lemon and goes good with the garlic


I'm also thinking about a mix of onion and garlic powder, or add some chili powder, or soy sauce and garlic powder, or powdered ranch dressing mix (I saw that one on the internet).  Some people also use sweet spices (cinnamon, nutmeg, ginger) with a sprinkle of sugar.  The list goes on and on only limited by your taste preference and your imagination.  ;)

Thursday, July 26, 2012

Waterfalls Along The Icefields Parkway

In June, Lulu and I travelled through the Icefields Parkway coming home from Rocky Mountain House.  I love the power of waterfalls so I stopped at a number of them along the way.  Most of them were really roaring because we have had a wet spring and goodly amount of snow in the mountains this winter.

The first one I stopped at was a pullout for the lookout for Bridal Veil Falls.  There was a hiking trail that I followed and got quite muddy because it had just rained.  I didn't go too far because it was slippery and I didn't want to slide down the mountain slope.


While walking the trail to Bridal Veil Falls, I could hear a dull roar off to the left.  I ventured that way and found a huge rushing waterfall.  I got quite wet from the spray and had to wipe off the lens and my glasses several times.  I found out later that this is Panther Falls.


Continuing down the road towards Jasper, you round a corner and Boom! on your right is Tangle Falls.  There is a pullout on the left side of the road so you can stop.  It was quite a pretty falls and no muddy hike in order to snap some pics.


Then a short way down the road, I came across a waterfall off to the left.  I pulled over and quickly snapped away.  I couldn't find a name for it anywhere.


Next stop, Sunwapta Falls.  There are paved pathways so not as much chance of getting muddier.  (My pants already looked bad from the knees down.)  You could tell that the water is high this year because several walkways closer to the falls were blocked off because the river was over its banks and covered some of the pavement.


Last stop, Athabasca Falls.  Again there is pavement so mud wasn't a problem, but in several places you had to walk through water 1 to 2" deep to get further up the path.


Lulu had to stay in the car while I snapped pics at all the falls.  I took her out several times during the trip but she didn't like all the water laying around nor the rain.  She is a fair-weather bird.

Monday, July 23, 2012

Chocolate Cake and 7 Minute Frosting

Years ago, I used to make 7 minute frosting in a double boiler, beating it with a hand mixer.  I hadn't made it for quite a while and was remembering how good it was.  Unfortunately, I got rid of my hand mixer so I didn't think I could make it again.  I checked on the internet and found several recipes that didn't need the hand mixer and double boiler.  I decided to give it a try.  I like it on chocolate cake and had a cake recipe I wanted to try as well. So here they are.
http://www.bestmoistchocolatecakerecipe.com/   http://www.kingarthurflour.com/recipes/favorite-fudge-birthday-cupcakes-with-7-minute-icing-recipe

Chocolate Cake
Ingredients
2 c flour
2 c sugar
3/4 c cocoa
2 tsp baking soda
1 tsp baking powder
2 eggs
1 cup buttermilk (I used 1 Tbsp vinegar in 1 cup, add milk to make 1 cup)
1 c oil
1 1/2 tsp vanilla
1 c boiling water or strong coffee (I used coffee)

Preheat oven to 300°F and grease and flour a 9" x 13" pan.
Mix all dry ingredients together to prevent lumping. (The sugar does the trick.)


Add rest of ingredients except hot water or coffee and mix for about 1 1/2 minutes.  Add coffee and continue to beat until smooth.


Pour into pan.  Bake for 1 hour at 300°F or until toothpick comes clean.


Cool on rack.


7 Minute Frosting
Ingredients
2 egg whites
1 c sugar
1/4 tsp cream of tartar
1/3 c water
1 tsp vanilla

Beat egg whites until foamy and thick.


Place sugar, water and cream of tartar in saucepan.  Stir well and bring to boil until sugar is dissolved.  Then boil without stirring for 2 minutes or until 240°F on candy thermometer.


Beat egg whites while slowly pouring in hot syrup.  Continue beating and add vanilla.  Then beat until icing forms peaks that hold their shape.


Spoon frosting onto cake and spread thickly.


Swirl with knife into peaks.


Cut a piece and enjoy!  Eat leftover frosting with a big spoon.  ;)  It tastes like marshmallow cream.  Barry and I pigged out and enjoyed it immensely.


The cake was very moist and chocolaty.  Yummy indeed!  And the frosting was as good as I remembered it.  The only think about it was that it did not keep as well as the stuff I made in a double boiler.  That icing would get a thin crust that protected the rest.  This frosting did not get a crust so the frosting slowly deflated over time.  Maybe I didn't boil the syrup long enough (next time I'll use a thermometer)  All in all it was great and I would definitely make these both again.

Thursday, July 19, 2012

Crooked Bush

When Lulu and I visited my parents, they had planned a road trip to see the Crooked Bush that grow near Hafford, Sask.  Since I had never seen them, we all went together.

Lulu wasn't very happy since she had to lay an egg and also had to share the back seat with me.  Some of the roads were a bit rough and she didn't like getting jostled about. 

I've heard them referred to as The Crooked Bush or The Crooked Trees.  They are a grove of aspen trees that grow very crooked for some unexplainable reason.  There is a similar grove right across the road that grow straight and normal.


This is the sign at the bush that gives you more questions instead of answers about the trees and why they are crooked.  There was a study at the University of Manitoba that explained that the trees have a genetic mutation but doesn't say why or how it happened.


Each tree is different and unique. Some have major turns in their trunks like the one below.


Several have grown across the boardwalk erected by the Friends of the Crooked Bush to help protect the trees from being disturbed.


Look at the wavy branches on this tree.  Almost like undulating snakes.


This looks like a person standing there with one hand on their hip and the other in their hair.


This one grows horizontal to the ground before making a 90° turn.


It was very peaceful and quiet in the bush.  Almost a feeling of someone holding their breath.


This one looks like a corkscrew.


Some of the trees have died but their stark crooked skeletons add to the mystery of the bush.


It was amazing to see all the twists and turns in the branches.


It would be neat to visit the trees in the fall after the leaves have fallen to really appreciate and view the bush.


These two almost look xrated.


Just look at all the directions this on trunk goes!


If you have a chance to visit the trees, take the time to do so.  They are a wonder to see.  The directions are in the following link.   http://saskatchewan.worldweb.com/WestCentralRegion/Hafford/SightsAttractions/ParksGardens/

Monday, July 16, 2012

Lulu's Comb

Over the years, Lulu's comb has changed drastically.  This is her baby comb when I first separated her from the rest of the flock when they were slowly starving her to death.


Here she is again after she moved into the corner of the kitchen.  Isn't she cute!


Here you see her sporting a "comb-over" (according to my son).


Sometimes Lulu's comb-over looked like a hat as it was so big and flat.


When she molted and stopped laying, her comb shrunk again.


Here she is drinking and sporting a stand-up comb.  It was quite thick but upright.


This photo shows her chewed off tip where she had a fight with another hen through the fence.  Lulu knew she was special and made sure the other chickens knew as well.  More than once there was posturing and pecking, scratching and flapping through the wire fence.  Sometimes Lulu won but sometimes she lost.  It happened so quickly that I  often wasn't able to prevent it from happening.


This shows a slight flop-over.  Until I had Lulu, I never realized that combs change over time - and now always getting bigger.  She is in one of her non-laying stages.  You can tell by the colour of her comb and wattles.  When she is laying, they turn a deep, rich red.


A partial comb-over during the winter to keep her head warm.


Upright up-sweep.


Doesn't it almost look like her comb is giving us the finger?


This is the latest that Lulu is sporting.


Have you ever felt a chicken's comb?  Do so if you get the chance.  It has a soft spongy feeling.  Quite unlike anything else I've felt. 


Now back to the real world after learning more than you'll ever need to know about chickens' combs.  ;)