Showing posts with label cherries. Show all posts

Thursday, June 13, 2013

Apple & Cherry Buns

I found the recipe for Apple Buns here and decided to give them a try. I decided to make both apple buns and try cherry buns so I made a double batch of dough.

Ingredients (for a double batch)
Dough
2 c milk, scalded
1/2 c sugar
2 Tbsp oil
1/2 tsp salt
5 tsp yeast
6 c flour


Fillings
#1.  2 - 3 apples peeled and diced
3 tbsp. butter
1/2 c brown sugar
cinnamon

#2.  for cherry filling I used the above with 1-2 cups pitted frozen cherries instead of apples
cornstarch for thickening

#3.  I had extra dough so mixed up some spiced apricot jam, chopped nuts and chopped raisins.  I did not cook this filling but used it as is.

Scald milk and then mix with sugar, oil and salt.  Cool until lukewarm and then add yeast.  Let sit 10 to 15 minutes until it becomes frothy.  Mix in flour and knead for 10 minutes.  Place in a greased bowl to rest and rise until double in size.

I made the dough first and while it was rising, I made the fillings.

Melt butter in pan and add brown sugar.  Stir to combine, then let caramelize at medium high heat.  Stir only enough to keep from burning. 


Add apples and cinnamon and cook until apples are soft and mixture has thickened.  Let cool before using.


For the cherry filling, I added some cornstarch as it was cooking because they are much juicier than the apples.  I just sprinkled on a bit at a time and let it cook until thick.  Cool before using.
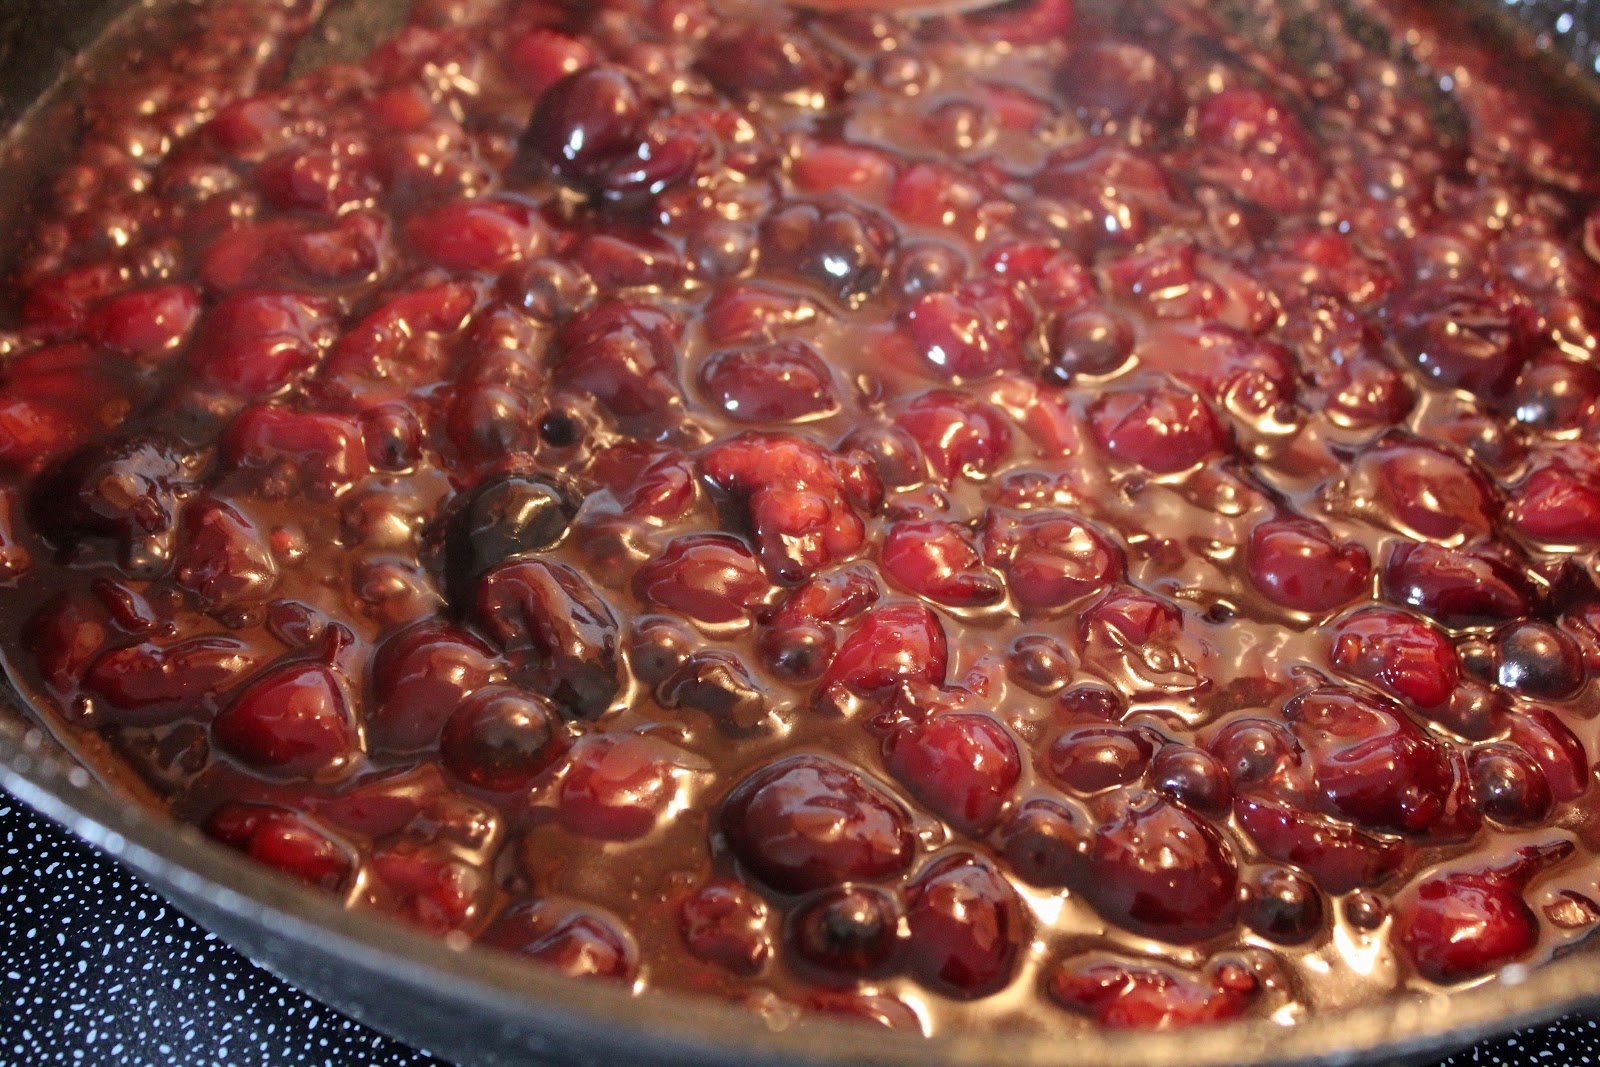

The original recipe was for 16 buns but with it doubled, I only got 24.  Roll the dough into a circle and the fun begins.


I used this video as guide for shaping the buns.  I watched it numerous times as my fingers kept forgetting what I wanted them to do.  Place a spoonful of filling in the centre of the dough.


Pleat the dough following the video making sure the filling is all inside.


Continue pleating until entire edge is done.  Once my fingers got the feel of the action, it was fairly easy, but I had to stop and rewatch the video because they would sometimes fumble and forget.
 

Once the dough is in a nice bunch, twist the dough as they do in the video to close and seal the bun.


Voila!  I was impressed with myself!  The buns actually looked nice.


Place buns twisted side down on a baking sheet.  You can brush top of bun with egg wash if you wish.  (I didn't)


Bake in a 400°F oven for 15 minutes.


Cool on rack.  I found that a few of the jam and cherry buns leaked a bit and the filling burnt to the pan.  I think they were not sealed as good as the others but also those fillings were juicier than the apple filling.


All three fillings were tasty.  Enjoy!  ;)


Monday, May 27, 2013

Fruit Trees Spring 2013

Well, it has been a weird spring as far as the weather.  We had frosty cold nights (down to -5°F) a few times and a week of +30°F weather.  The last week, we had lots of rain - enough to half-fill the small wheelbarrow.

I went out to check on how the fruit is coming and found both good and bad news.

Next to no peaches.  Last year we had so many that I had to thin them out.  The late frost happened when the trees were blooming so no peaches.  :(


The apricot tree in the back is loaded - even with Barry's severe pruning this year.  He cut the tree back quite a bit to shorten it so we don't have to climb so high on the ladder to pick the fruit.


We are going to have lots of plums.  They seem to be very hardy as we have had an abundance of plums each year.


Look at the poor cherries!  :(  They are so scarce, we didn't even bag the trees against the cherry fruit fly this year.  it was too much work for so few cherries.  The frost hit the cherry blossoms as well as the peaches this year.  :(


It looks like the apple crop will be good.  I will be soon thinning out the apples so the fruit gets bigger.  I'd rather have fewer but larger fruit than lots of small apples.


The pears are plentiful and will need thinning as well.


Here is the second apricot tree which is loaded like the other tree.  It'll be the year for apricot juice and jam.


Monday, October 1, 2012

Cherry Berry Jam

Last year I checked out many different jam recipes.  I liked the idea of a mixture of fruit.  I didn't find one for exactly what I wanted, so I made one up.

Here is my recipe for Cherry Berry Jam

Ingredients

12 c cherries
4 c raspberries
4 c blackberries
4 Granny Smith apples
1/2 c lemon juice
1 c homemade pectin
10 c sugar

I use frozen fruit because these three do not ripen at the same time.  I bring out the needed fruit a day or two ahead and thaw it in the fridge before making the jam.  I use pitted cherries and squish them as I put them into the pot.  It serves two purposes - to check for missed pits and to make it easier for the cherries to break up during the jam process.  The first time I made cherry jam I didn't do this and had to try to squash the cherries with a potato masher part way through cooking.  It is easier to squish them before cooking than mash them while they are steaming hot.

 
The blackberries are a thornless variety that grow in our yard.  I don't know if we have two varieties but some of the berries grow much larger than the rest.  The small ones are also harder to pick as they don't release from the stem as easily as the larger ones. 

 
The raspberries here seem to have a better crop in late summer.  They do produce in the spring but the berries are small and dry out quickly.  In the latter part of August and on into September and even October - we have big, juicy berries. 

 
I peel, core and chopped the apples.  The apples not only add natural pectin but give little appley bits to add texture to the jam.  Some apples mush-up quite readily when you cook them, but grannies seem to hold their shape better. 

 
Mix all ingredients except the sugar in a large pot and cook until fruit in soft and breaking apart.  Add sugar and continue boiling and stirring until it reaches the jam stage.  (either 220°F on a candy thermometer or the cold saucer test)

 
Pour into sterilized jars and process for 10 minutes in hot water bath.  The recipe makes 10 - 11 pints.  Enjoy!  ;)


Thursday, September 27, 2012

Pitting Cherries

Cherries are pitted much earlier in the year but since I'm posting a cherry jam next time, I decided to talk about pitting cherries.

This was my first cherry pitter.  Very slow and messy.  One at a time and juice splatters everywhere.  I borrowed a larger one that had a reservoir to catch the pits but it still only pitted them one at a time.  It was not as messy but my hand got sore from pushing down the plunger so many times.

 
I decided to splurge and get a multi-cherry pitter since I have four cherry trees and they produce many pounds of cherries. 

 
I freeze some of the cherries with pits just to eat as fruit during the winter.   I pit the ones I am going to use for jam, desserts, smoothies, and baking.

 
As you can see, it pits five cherries at once.  You fill the hopper with cherries and give them a nudge into the holes.

  
You pull the lever and voila five done in an instant.

 
As you can see the pitter comes down and pushes the pit through the cherry into a container.


You can see the sharp teeth that push out the pits.


The cherry stays on the pitter to fall off into another container.


Here are the cherries - ready to be bagged and frozen.  I usually make my cherry jams in the early fall when things have slowed down in the garden.  July is too busy and often much too hot to be making jam.
 
 
Here is the pile of pits.  This pitter is quick and not too messy.  It isn't 100% perfect so you do have to check for missed pits.  This happened with the other pitters as well.  Sometimes the pitter slides alongside the pit and leaves it in the cherry.  But this is minor to getting the pitting done quickly.  I do a quick check when bagging the cherries and again when I thaw them out to use to remove any missed pits. 

 
All in all, I'm happy with my cherry pitter.  It makes cherry pitting much simpler.
 

Monday, June 6, 2011

Bagging Cherry Trees

When we bought our "little slice of heaven", we decided we did not want to use pesticides.  We wanted to grow healthy, organic fruit and vegetables.

The first spring we were here, we heard about the cherry fruit fly.  The adult emerges from the ground and lays its eggs on the cherries.  The maggots then live off the fruit until they turn into flies and winter in the ground to continue the cycle.

Many people around here just eat the cherries until the worms get too big and then the rest of the fruit is lost.  I thought "YUCK!"  I was not interested in eating worms of any size.

Spraying wasn't an option we wanted to use because we were told that it would be very costly since the flies can come over from the neighbouring trees and yards so we would have to spray repeatedly.  We also looked into organic sprays but none were found to be totally effective.

I did research on the internet and came across the following link that looked interesting. http://www.kootenaycovers.com/Kootenay_Covers_2010/Home.html   A bonus to me is that Kootenay Covers is a Canadian company right here is British Columbia.  (Yah! support local!)

We decided to order bags for our trees and have been using them to great success since then.  This is the third year we have used the bags and they are in as good shape as when we started.


They suggest that you install the bags when the fruit is just turning pink.  This year we covered the trees the long weekend in May because my hubby came home and we had help.  The fruit is just starting to form but the flowers have all been pollinated so it should be okay.


I wasn't able to get photos of the actual bagging process because I was helping.  Here we see a large bag on a very large tree.  It is getting easier each year because we have been pruning the tree smaller and shorter year by year.


Here the bag is being adjusted using long poles.  Last year, my son who is over six feet tall was here so we rolled up the bag and he climbed the tree and unrolled it.  I was on the ground with a long pole adjusting the bag.  Because the tree was so large, it actually worked better than trying to use the poles to get the bags over the tree.


After the bag is adjusted, you tie it to the trunk with bungee cords.  There are four side panels that are attached to the top square of the bag.  I pin these openings shut with safety pins so no bugs can work their way into the bag.


Here is the finished tree with all loose ends tucked in.  We keep the bags on until the cherries are ready to eat.  We then pick one tree completely before opening another bag.  We learned this the hard way the first year.  We uncovered a tree that was starting to get ripe and picked the ripe cherries.  We went on to other trees and when we came back to the first tree later, the cherries had worms.


The bags are a wonderful way to have tasty fruit without pesticides or "added protein".  The bag is made of a mesh material that allows sun and rain to penetrate.  They do not harm the trees at all.

We also found out that it is better to bag the trees earlier than later.  The first year we were here, we had bagged all the trees except one.  My hubby had to leave to help with a forest fire for a few days.  When he returned, we bagged the last tree.  But it was already too late, the flies had laid their eggs and the cherries were full of worms by the time we uncovered the tree and went to harvest the cherries.  How disappointing!  A whole tree of unusable fruit!

Monday, May 2, 2011

Cherry and Plum Trees in Bloom

  
by AE Housman (1859 - 1936)

Loveliest of trees, the cherry now


Is hung with bloom along the bough,


And stands about the woodland ride


Wearing white for Eastertide.


Now, of my three score years and ten,


Twenty will not come again,


And take from seventy springs a score,


It only leaves me fifty more.


And since to look at things in bloom,


Fifty springs are little room,


About the woodlands I will go,


To see the cherry hung with snow.


All photos taken in BC, Canada.