Showing posts with label drying/dehydrating. Show all posts

Wednesday, March 20, 2013

Sourdough Sharing - Cake

This month for Sourdough Sharing, I have two sourdough cakes to offer. 

The first one is a Carrot Cake that I previously blogged here.  It is Barry's favorite carrot cake as he hates dry cakes and this one is very nice and moist.  It is very tasty with the nuts, raisins and pineapple added.


The other cake is a Sourdough Fiesta Cake that I found in my Sourdough Cookery cookbook by Rita Davenport.  I was pleased to be able to use my own dehydrated beans and raisins from my garden as well as our own apples in this cake.

Ingredients
1/4 c butter, softened
1 c sugar
1 egg
1/2 c milk
2 c mashed cooked pinto beans
1 tsp vanilla
1 c sourdough
1 c flour
1 tsp baking soda
1 tsp cinnamon
1/2 tsp cloves
1/2 tsp allspice
2 c diced apples
1/2 c chopped nuts
1 c raisins

To make the beans, I soaked 2 cups of pinto beans overnight.  I then drained them and cooked them in fresh water til they were tender.  I then redrained them and mashed 2 cups of beans.  I had 2 cups of beans left over that I will use when I make refried beans later this week.  I now know that you only have to soak half of what the recipe needs as the beans double in size.


Beat together butter, sugar and egg.  Add milk, vanilla and beans.  Mix in the sourdough.

Combine dry ingredients and add to mixture.  Stir in nuts, raisins and apples.


Pour into a greased bundt pan and bake at 375°F for 45 minutes.  


Cool in pan for 5 minutes.  


Remove from pan and glaze when cool.


Glaze Ingredients
1 c icing sugar
1 tsp vanilla
2 Tbsp milk

Blend all ingredients and drizzle onto cake.  


I found the cake to be nice and moist.  Usually when you bake with apples, the standard spices seem to be cinnamon and nutmeg.  Using cloves and allspice gives it a different and pleasing taste.  The pinto beans are not noticeable but add hidden protein to the cake.  Enjoy!


Try one of these or take a look at the blogs below for other sourdough cakes.


Thursday, October 25, 2012

Making Raisins


The grapes were plentiful this year.  Our earliest grapes are seedless green grapes that are very sweet.  I'm not sure what variety they are but one neighbour said she thinks they are Himrod.

 
The grapes are a nice size and sweeter than any grape I've ever bought at a grocery store.

 
There were too many to eat and since they are seedless, I thought they'd be a perfect grape to use for making raisins.

 
I picked, washed and sorted the grapes.  I made sure they were well drained so as not to add to the drying time. 
 
 
The one complaint I have about this type of grape is the stem often comes off with the grape.  These all have to be removed or else you have little dry sticks on your grapes.    

 
I filled my dehydrator trays without piling the grapes on top of one another. 

 
Here are the raisins dry and ready to be bagged.  I find drying times vary from batch to batch depending on the outside temperature and humidity level. 

 
Now I'll have fresh homemade raisins for eating and baking all winter.  ;) 


Monday, October 8, 2012

Parsley Seeds

Did you know parsley is a biennial?  That means it produces seeds the second year before dying off.  Here is my parsley earlier this year.  This is the first year I've had it regrow the second year.  When I lived in Saskatchewan, it was too cold for the plant to survive the winter.  Last year, I covered my herb beds with leaves and it seemed to protect the plants.

 
The plant did not take long to start sending out flowers. 

 
It looked quite pretty and lacy as the flowers were greenish-white. 

 
The bees and other insects really liked the parsley flowers and were always swarming around it. 

 
As the flowers turned into seed heads, I decided it was time to harvest before I had a huge parsley field covering my herb garden and walkway.

 
I cut off bunches of seeds and laid them on the lawn so I could tie them together to hang up to dry.  Of course, Lulu had to come over and check out what I was doing.  Parsley is not a favorite of hers.  In fact, none of the chickens were very interested in it.

 
After the bunches were tied up, I hung them up to dry.  Lulu stuck around hoping for something more edible.

 
Here the plants have dried sufficiently to harvest the seeds. 

 
After the seeds were removed from the stems, I laid them out to dry some more.  I always try to make sure the seeds are totally dry so they don't spoil during storage.

 
Now I'll have seed for the next few years plus some to give away.  ;) 


Thursday, September 20, 2012

Growing Soup Beans

We have a Seedy Saturday seed exchange here and I have tried several different seeds over the past several years.  I tried several bean varieties last year - pinto, black and white.   I only had a few of the white beans so I used them all for seed this year.  They were labelled as Cherokee Trail of Tears so I have been calling them that until I went on the internet and found that Trail of Tears beans are black.

Here are the beans in the garden earlier this summer.

 
They are a bush-type bean.  They grow green pods with a pinkish blush on some of them. 

 
As they got more mature, they turned pinker. 

 
I pulled them out before they were completely dry so they could dry indoors.  Last year I left my beans too long in the garden and a number of them split and spilt their seeds in the garden.

 
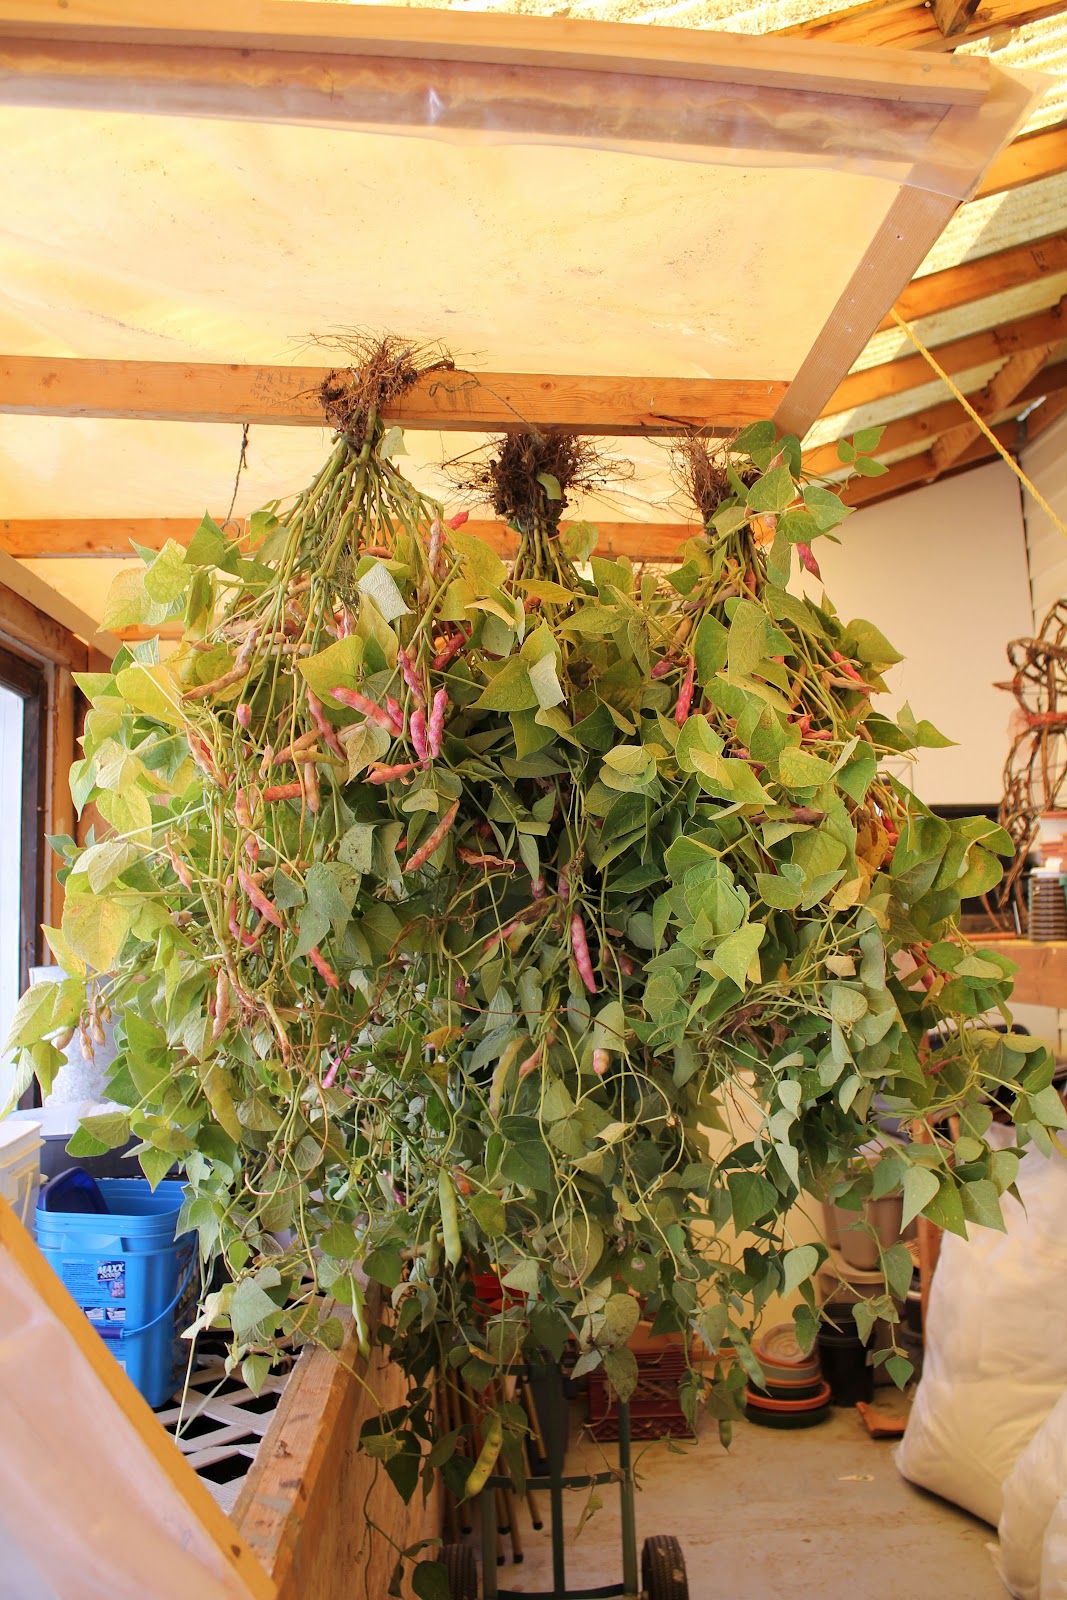
I tied them together and hung them in the greenhouse.  After they dried, I shelled the beans.


I set them on a tray to make sure they are completely dry.  Notice the shape of the beans - they are more roundish than regular white soup beans.  I'll have to do more research to see if I can find out what they are. 


Monday, August 27, 2012

Saving Spinach Seeds

I decided to save my spinach seed this year.  Here are the plants going to seed.


Did you know that spinach has male and female plants?  You can't tell the difference until they start to go to seed.  (maybe some people can but I can't)  This is a female plant.  You can see the little lumps in the joints?  That is the start of the seeds.


This is the male plant.  It gets many tiny flowers all up the stalk.  When the plant moves in the wind or if you brush against it, the pollen looks like a yellow dust cloud.


Here is a female plant drying up outside.  I let them dry most of the way out in the garden.  When you are saving seeds, you don't want to save the first plants that go to seed as that is not a trait you want.  You also try to save seed from the largest, nicest plants so you continue those traits.


When the plants are fairly dry, I pull them out of the ground and tie them in bunches.  I then hang them upside down in the greenhouse to finish drying.  This way I don't have the spinach reseeding itself in the garden.


When the spinach is all dry, I put it in an old chicken feed bag to knock the seeds off.  Some people pick the seeds by hand but I don't really care if I have some leaves, etc. in with the seeds.  The seeds won't grow any better if they are clean and my way takes much less time.


After crushing the plants to remove the seed, I dump it into a container.  I usually spread the seeds out for a final drying.  I then sort out some of the larger chaff and then label and store the seeds until next year.


Monday, July 30, 2012

Dehydrated Kale Chips

I first tasted Kale Chips in Valemount at Barry's niece's place.  They were wonderful.  So I decided to plant kale this year so I could make some chips.  Right now we are having a heatwave (temps are +35°C) so it is too hot to use the oven.  I found a couple of recipes that use the dehydrator so decided to try that.

http://goodlookinghomecooking.blogspot.ca/2012/05/dehydrator-diaries-kale-chips-with.html
http://vegetarian.about.com/od/rawfoodsrecipes/r/Raw-Kale-Chips.htm

I planted two kinds of kale this year - Dwarf Green Curly and Redbor F1.  I won't plant the Redbor again as it was very expensive for the seeds ($3.99 for a package that contained 18 seeds!  And out of those only 8 grew!)  The green with do nicely, thank you very much!

Here is a leaf of green kale and one of the red kale.


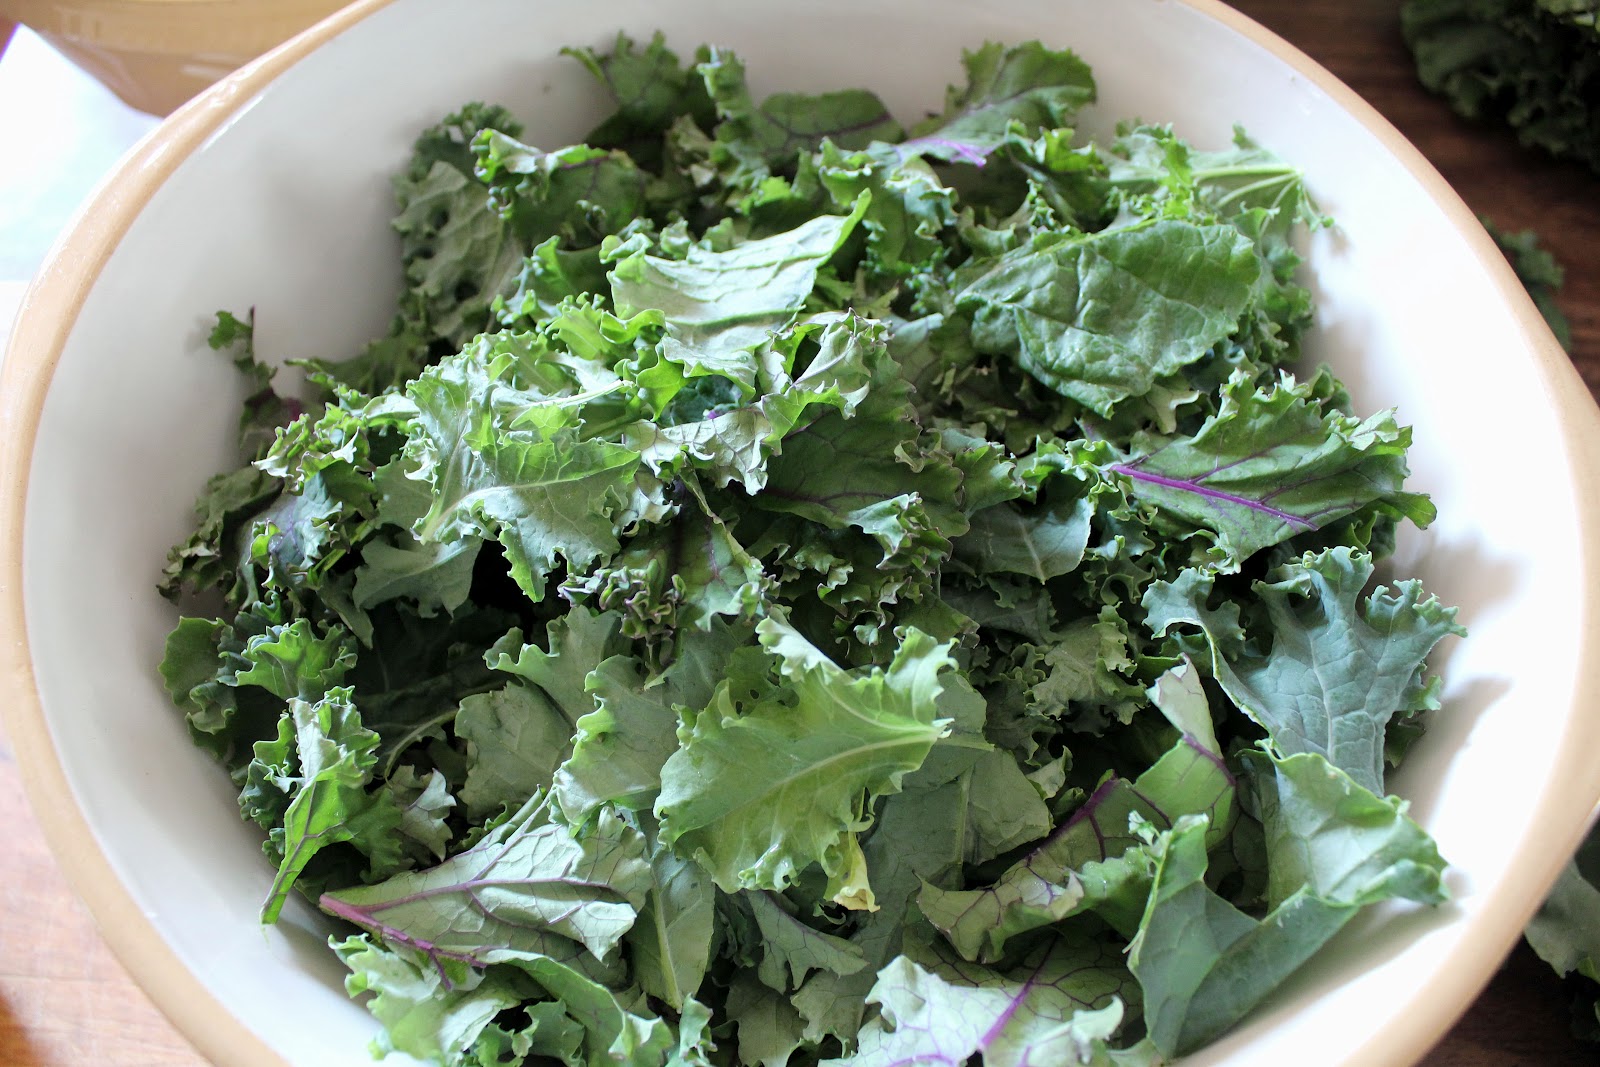
Here is the kale all washed and spun dry.


Rip the kale into bite-sized pieces.  Do not use the tough middle stalk.


Drizzle on olive oil and sprinkle with salt.  Add whatever seasoning you want.  Some ideas that I tried are listed below.  Mix well using your hands making sure oil, salt and spices cover all the pieces.


Lay out on dehydrator trays in single layer.  Try to have some air space around the pieces of kale.


Dry for 2 hours on 135°F or until dry and crispy.


Eat and enjoy.  Or as I read on the internet, put in a ziplock bag and freeze.  I decided to freeze some so I have snacks for the winter.  I left the bags fat with air so the chips won't crush so easily.  I also placed them in the freezer basket so they won't have something heavy land on them. 

UPDATE - I tried the chips from the freezer and they were a bust.  They did not keep their crunch and were very chewy.  The flavor was good but I miss the crunch and got tired of chewing.  Oh well, you just don't know until you try something.


I have been trying a variety of flavors to see what I like best.

1.  garlic powder - favorite so far

2.  balsamic vinegar - so-so, I wanted a salt and vinegar flavor but balsamic vinegar was too mild - needed more bite to it

3.  lemon juice and black pepper - good, the lemon flavor came through as well as a slight bite from the pepper

4. parmesan cheese - second favorite - very tasty

5.  dried dill weed and a bit of cayenne pepper - can taste dill a bit but no bite (not enough cayenne and dill taste not strong enough)


6.  lemon juice and garlic powder -good - nice bite from the lemon and goes good with the garlic


I'm also thinking about a mix of onion and garlic powder, or add some chili powder, or soy sauce and garlic powder, or powdered ranch dressing mix (I saw that one on the internet).  Some people also use sweet spices (cinnamon, nutmeg, ginger) with a sprinkle of sugar.  The list goes on and on only limited by your taste preference and your imagination.  ;)

Monday, August 8, 2011

Drying Herbs

Last year I dried most of my herbs in my dehydrator but found some of them did not work as well.  Sage takes much too long to dry so I dried it by our wood stove instead.

This year I decided to try drying some of the herbs by hanging them in bunches in the greenhouse.  You are supposed to cut your herbs in the morning before the sun dries out their scented oils.


Last year I dried lots of chocolate mint for tea.  Everyone who tried it loved it.  This year my chocolate mint is not growing very tall so I won't have as much to dry.


I decided to try drying my spearmint and peppermint to see if I like the tea from them.  I have heard from some people that they don't make very nice tea.  I dried a small bunch of each and tried the tea when my sister-in-law was visiting.  Neither of us liked the tea.  I put it down to the weather as this year has been wetter than usual and not as warm. 
Since then I was reading a thread in The Easy Garden http://www.theeasygarden.com/forum/viewtopic.php?pid=290791#p290791 about someone else whose mint wasn't very minty.  They were told that if they started the plants from seed they may not come true to the original.  It is best to start mint from a slip from a plant you like instead of seeds.  I may get rid of those mints and expand my chocolate mint.


I also decided to dry some oregano by hanging since it has long stems and small leaves.  I read you are supposed to harvest herbs before they bloom for the best results but I was late with the oregano.  I cut off the flowers and hung it to dry.


Once the bunches were dry, I brought them in to remove the leaves from the stems.


Here you can see a close-up of the dried oregano plants.


The leaves were placed in a bowl and then were crushed into smaller pieces.  The oregano did not smell as strong as they have previously but that could be because they were blooming.


I also cut some sage to dry.  Last year I had tried to dry it in a dehydrator but the leaves are too thick and took too long.


I used young branches as I had previously trimmed back the old woody branches after they bloomed.


I tied the sage in small bunches to hang in the green house.


I also picked stems of lavender to dry.


The little bunches of lavender are so pretty and nicely scented.


I hang the herbs from cup hooks I screwed into the cross beams.  I space the bunches out so they are well ventilated and have room to dry.