Thursday, September 22, 2011

Greek Salad

I love Greek Salad.  Since my cukes and tomatoes have been ready in the garden, I've eaten this salad at least three or four times a week.  Even when only my cucumbers were ready, I ate a modified version with only cukes on a regular basis.

There are a number of different ingredients that you can use for Greek Salad but I'll show you my version.  You can use this as a starting spot and add, subtract or change whatever you like to make it your own.

I start with three or four cucumbers, depending on the size and how many people I am serving.


I used a bunch of cherry tomatoes that grew 1 1/4" to 1 1/2" in diameter.  I don't know the variety because I had quite a number of volunteers this year from the produce chipped from the grocery store.  I had tomatoes, squash, melon and pumpkin that grew on their own.  Some got pulled out but many were left to see what they produced.


Peel and slice the cukes.  Some people like wedges or very thick slices.  I like mine about 1/2" thick.  Some people also remove the seedy centres but I like them. 


Since the tomatoes were too large for one bite, I sliced them in half.  I do you large tomatoes cut into chunks on occasion but am saving them for canning this year.


I like to use pitted black olives and cut them in half.  Some people use whole olives with pits.


Crumble on some feta cheese.  Many people also add onion slices - either white or red but raw onions don't agree with me so I leave them out.  My sister-in-law also adds green peppers chunks.


Sprinkle on crushed oregano leaves.  I like oregano alot so I crush two large pinches of it.


I then drizzle on olive oil and balsamic vinegar.  My mom uses regular vinegar but to me the taste is lacking the flavor of the balsamic.


There you are all ready to go.  Again I didn't give amounts because I find more or less oil and vinegar is all a matter of taste.


Toss the salad to mix and coat it all with the oregano, oil and vinegar.  Add salt and/or pepper to taste if you wish - I don't.  Enjoy!  ;)


Monday, September 19, 2011

Mount Robson

Mount Robson is the highest point in the Canadian Rockies.  Many of the mountains lose their snow-covering during the summer but Mount Robson never does.


Here is the Rocky Mountain Goat that guards the entrance to the park.


Lulu stopped to stretch her legs and take a look around.  While visiting the goat, Lulu also met a family from Prince George, BC who all wanted to pet her and take her picture.


Being the ambassador for chickens that she is, Lulu was a perfect lady and let all the children pet her.  The one girl couldn't get over how soft her feathers were, while her little brother wanted to know if I bought her at a store.


After they left, Lulu had some time to check out her surroundings.  She wasn't too impressed with the stop because there was not much to interest a chicken.


Here is another view of Mount Robson from the parking lot near the information centre.  We stopped here on the way home so Lulu could stretch her legs again.  She really enjoyed the grassy area amongst the trees at the far end of the parking lot where she found things to eat and peck at.  This was more of her style of pit stop. ;)


Thursday, September 15, 2011

Baby Robins


One day during mid August I was working in the garden and noticed a young robin hopping around on the ground in the chicken run.  He didn't seem able to fly so I moved him into the garden so the chickens wouldn't hurt him.


He ran around cheeping loudly and soon there was a full grown robin flying about checking him out. 


He was so cute but seemed to young for the time of year.  I didn't think he'd mature enough to make the long flight south for the winter.


I had to leave to pick up chicken food and didn't want the neighbour's cat to get the little fellow so I set him up in a tree.


He seemed content there and his parent came and checked on him and even brought him some worms.


Doesn't he have the cutest face?  He seemed to have a swelling near his mouth on the other side of his beak.  I thought maybe he hit face first when he fell in his flight attempt.


After I came home I set him down in the garden not knowing what else I could do.  He looked so small and forlorn.


Nearby in the corn patch I noticed another baby robin.  Look at those cute tufts on its head.  I could just hug that sweetie and wanted to keep him.


This one was even smaller and had less grown up feathers that its brother.  Mom or pop was staying nearby bringing food.


I hope they are survivors and are able to make the flight south.  I also hope they get strong enough to get off the ground and keep away from cats.  They disappeared into the corn patch so I hope they are fine.


Update:  Just last week I found one poor dead baby bird in the backyard.  I fear it is one of those little cuties but can never be sure.  All I can do is hope and pray they survived. :{

Monday, September 12, 2011

Three Plum Jam

We have a number of varieties of plums growing in our yard.  We have the purple Italian or prune plums that I make into prunes later in the fall.  We also have three earlier varieties that I decided to mix and make into a Three Plum Jam. 

The three plums I used are a round red variety similar to Santa Rosa plums,  a round yellow plum that is very juicy and has a very short season and larger oval plum that turns a dark purple over time. We don't know the names of the fruit we have here, we just guess at them.


I didn't use a recipe as such, I just checked out a number of recipes on the internet and found the proportions for ingredients were similar in most.

Ingredients 

12 c plums total (I used 4 cups of each kind)
½ c lemon juice
6 c sugar
2 c homemade pectin


Wash and sort plums of your choice. 


Pit plums and cut into pieces if plums are firm.  For the larger purplish red plums, I cut them into eighths.


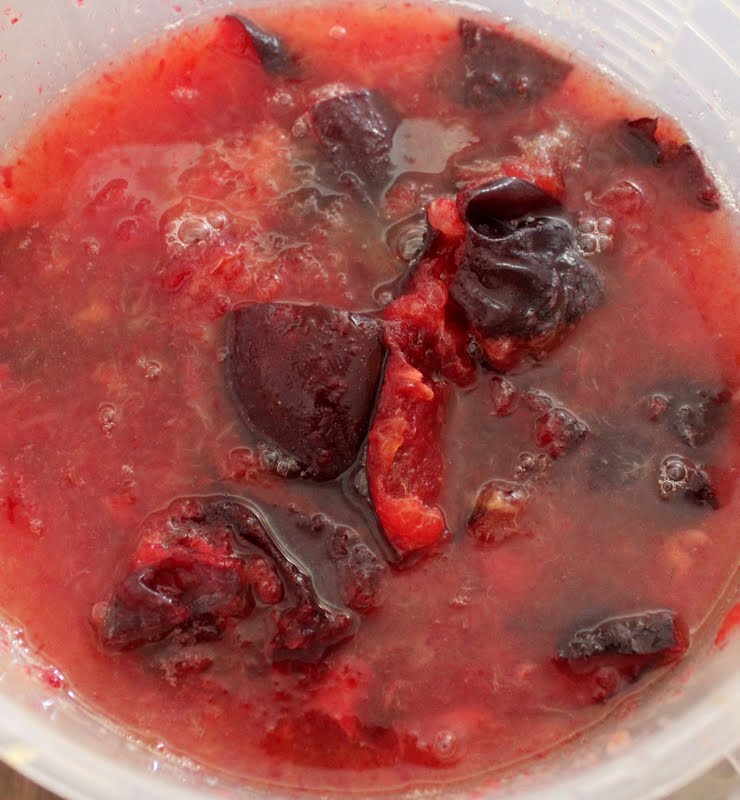
As mentioned before, the yellow plums are very juicy.  You more or less try to remove the pit and cut the skin into pieces without making a big mess.  I often poke a hole with the knife and squeeze out the pits catching the juice and pulp in a bowl and then cut/rip the skin into pieces.  If you eat one of these plums, you almost need to put the whole plum into your mouth before you bite it or else you will be covered in juice from your chin to your waist.  They are not a plum to eat in public - you either look like a messy slob with juice dripping off your chin or a pig with a whole plum stuffed into your mouth.


The red plums were juicy as well so they were pitted and their skins chopped into smaller pieces just like the yellow ones.


Mix all ingredients in a large heavy pot and bring to a boil.  Stir frequently for about 30 minutes or so.  I actually had to cook them for almost an hour.  The length of cooking time depends on how juicy your plums are.  If I had used only the larger purplish/red plums, my cook time would have been shorter.


Skim off the foam and cook until it passed the jam test.  (the saucer in the freezer mentioned in previous posts).


Pour into sterilized jars and process for 10 minutes in a hot water bath. 


The recipe made 9 pints of lovely red jam.  Isn't it a pretty colour!  ;)

Thursday, September 8, 2011

Goodbye to a Chicken

I just got back from being away a week to visit my hubby (he works away and doesn't get home too often).  I took Lulu with me as she always travels with me and loves the camper.  The rest of the girls stay home in the care of a neighbour. 

Before I left last week, one of the hens had a real pale comb that was quite droopy.  I have a number of girls that aren't laying because they are molting or broody or reasons unknown to me.  Anyway, she seemed to stay away from the others and not come running for food and treats.  I picked her up to check her over and she seemed okay - no cuts, swellings, or anything visible that looked to be causing her discomfort. 

When I got home, the neighbour was outside and said he noticed one of the chickens seemed sick.  I went back and found her alone by the waterer.  I picked her up and she seemed very fat like she was blotted or something.  Her feet were cold and so was her comb. 

I was walking to the shop with her to set her down on something so I could get a better look at her when she opened her mouth a couple times without making a sound.  Her head drooped over and she was dead - just that quick.  It was almost as if she waited for one more cuddle before she died.

I've had these chickens for 2 years and 2 months and had lost two of them early on when a neighbour's dog dug under our adjoining fence and got them.  They were fairly young and I was fairly new to chickens so it was sad but didn't hurt like this.

I don't know if I could have done anything for her if I had been home but I feel bad that she seemed to be suffering.    She didn't have a name (I only named Lulu) but it hurts to lose her.  She used to come running sometimes for a hug and a cuddle - not all of them like to be picked up and held but she did.  Some days, it seemed like a cuddle was more important to her than the treats I had brought because she would squat at my feet waiting to be picked up before she eat any treats.

I dug a hole in the corner of the yard and buried her there.  I am sitting here crying over a chicken - one of 28 that was just supposed to be a layer and not special.  I guess they all are special.  It feels like I have lost a friend.  Goodbye to a chicken who will remain nameless but will not be forgotten.  :(


Monday, September 5, 2011

Sui Choy Salad

I love Sui Choy Salad.  Sui choy is also known as Napa Cabbage or Chinese Cabbage.  I grew some successful two years ago so we pigged out regularly on it.  Last year my cabbage bolted and went to seed before it made heads.  This year is was very slow and seemed to rot off at the base of the plant.


Ingredients
1 head Sui Choy
1 c slivered or sliced almonds
1 package instant noodles - broken (not the flavour packet)

1/8 c sesame seeds
Dressing:
1/2 c oil
1/2 c sugar
1/4 c apple cider vinegar (I used Balsamic and regular mixed instead)

2 tbsp soy sauce
Bring dressing to a boil and then let it cool. Make sure sugar is dissolved.

In a frying pan, place the almonds, noodles, and sesame seeds. Cook them on medium heat, stirring them around in the pan until they are toasted. I found it is better to add the sesame seeds a bit later as they are so small and have a tendency to burn before the other bits are browned.


Wash and dry the cabbage. 


I usually slice mine in half before chopping it up.


It works quicker if you pile a number of slices together.


Slice the cabbage.


Place in a large bowl.


Stir the cooled dressing to mix and pour it on.


Add the rest of the ingredients.


Mix well and refrigerate.


Dish out and enjoy.


This salad is a good keeper.  It is tasty for several days.  (If it lasts that long)  ;)

Thursday, September 1, 2011

Growing Grapes

There seems to be many different ways of growing grapes.  My neighbour has his in straight rows growing on wire and posts.  He has a soaker hose under each row to water them.


He prunes and train the vines and attaches them to the horizontal wires.  This photo was taken earlier this spring.


Our yard came with several grape arbors.  The grapes grow up and over and make a tunnel of sorts.  Some of the grapes growing here are very sweet, seedless green grapes (variety unknown) that are great to eat and also make lovely raisins.


We added the bark since it was just bare dirt and weeds when we came.  This arbor needs some work since some of the grapes grow in the wrong direction and lay out on the flower bed on the front side.  I think heavy duty pruning is needed next year to get the vines growing where we want them.


On the way to the Abbotsford Airport, I saw fields of grapes growing like this.


I stopped to look and the top are all tied down to the top wire.


No one was around to ask why they grow them like this and I haven't been able to find anything in my gardening books either.  It does look quite neat at this stage though, doesn't it?


Here they are several weeks later.  I'd like to see them now but haven't had the time to take a trip that way.


This is the second arbor that was here when we got the place.  There was grass, mint, tulips, roses and weeds all mixed up under here.  Nothing did really well because of the shade and the fact that you trample everything when you harvest the grapes.  So I dug everything out and rehomed the bulbs and roses.


My son added this outside section on as he came home with some new grapes vines one day a couple of years ago.


My honeybunch added a peak to the entrance this summer as the vines were always hanging too low.


He also added more cross poles so we could tie up the young vines to train them to go up and over.


Here is Inspector Lulu checking out the new digs.  She approved as we've found her snoozing here in the shade sometimes.  Now all we need is to put peaks on the other entrances and put in bricks of some sort for a floor and we have a nice little shady nook.


Here are some of the grapes that have a ways to go to turn a luscious dark purple.  They will soon smell and taste heavenly.  I also use these to make juice and jelly from them.


We also inherited some wine grapes.  They are small and seedy so not great for eating.  I haven't really used them for much yet except the chickens love them as a treat.  No waste and everyone is happy.  ;)